18 September 2012

Easy Eco: Simple Upcycled Projects You Can Do This Week

Most people want to do the earth-friendly thing, but not all have the cash to shell out to buy top-notch eco products or the time to spend finding new ways to use old things.  If you are new to upcycling or are just looking for an easy project, here are a few ways to get started.

Use your old bottles and jars for something new.

The easiest thing to do is to clean out old glass beverage bottles, mason jars, and canisters and use them to store something new.  My favorites are mason jars and Starbucks frappucino bottles, because I have plenty of them lying around and they are super versatile. 


I especially like this milkaholic bottle idea from Half Baked: The Cake blog, which helps you to transform old bottles into adorable milk bottles in a matter of minutes.


Milkaholic - The Cake Blog
 
Another easy project is making drinking glasses out of old mason jars.  This craft idea seems to be everywhere from DIY blogs to stores.  The cheapest and  probably easiest way to get your own set is to make them yourself. 


Using hot glue or rubber cement, you can glue the bottom of an old jar to a candlestick base and have an almost instant wine glass.


 Another thing you can do is use old scarves or fabric scraps to make upcycled lingerie, throw rugs, or even clothes.
 
Things like shirts, lingerie, and scarves are easy to make out of old clothes and materials, because they don't require much fabric to create.  I like the idea of this paisley bikini set from Crafting a Green World, because it's fairly simple in construction. 


Crafting a Green World
 
If you've got a lot of scraps, or don't want the stress of following a particular pattern, you can create an interesting throw rug simply by sewing random pieces together.   
 
 
Free People BLDG 25 Blog
Inspired by Free People's BLDG 25 blog, I experimented with my own scraps to make an easy eco project:
 
My in-progress version of an upcylced throw rug

 
I really liked the idea of rug composed entirely of blue jean scraps.  I also found that mixing textures and patterns can create a really cool effect when creating upcycled pieces. 


Finally, you can simply cover something old in something new: Whether it's paint, glitter, or upholstery, sometimes old things can be salvaged with a minor facelift.


New coat, new look: 


11 July 2012

Kim Kardashian-Inspired Initial Earrings


Both her fashion choices and her relationship decisions land reality television star Kim Kardashian in a consistent slew of media headlines. Whether or not Kim is in love with Kanye West or is just having fun really doesn't matter much to me, but what I do find really interesting is her choice of accessories. Her initial displaying earrings are small, but make a bold personal statement and the simple gold is really chic, so much so that it inspired my most recent do-it-yourself project. 

Splash news
I'm sure it would be easy enough to buy a similar pair, but I thought it might be fun to try and make my own.  I used an old pair of earrings and a few cheap supplies and am pretty happy with the results.  Here's what I did:


1. First I gathered supplies: hot glue, foam letters, gold acrylic paint, craft crystals, and old earrings. 


2. Then I picked the foam letters I needed for each earring and removed the excess foam pieces.


3. After that I peeled the adhesive off the back of the foam letters and flipped the letters upside down.


4. Next, I stuck the letters to the old pair of earrings to make sure they fit nicely.


5. After checking the fit, I removed the letters and used hot glue for a more permanent application.


 6. Once the glue had dried, I began painting the letters with gold acrylic paint. 


7. I had to do several coats to get a finished gold look, letting each coat dry in between. 


8. Once painted with several coats, the earrings began to more closely resemble gold earrings.


9. For a finishing touch, I added small craft rhinestones, using tweezers and hot glue to place the stones. 


10. To complete the look, I removed excess glue and added earring backs.


The project worked out great: it gave me a trendy accessory that allows me to make a statement,  to share the one I love, or even to show some self-love by displaying my own initials if I decide to make another pair.  And if you change boyfriends more than you change earrings, this project is perfect because the earrings cost less than ten dollars to make and you are left with extra supplies in case you need to switch up the letters.  

10 July 2012

Receive No Evil

I'm a big believer in maintaining a positive attitude and surrounding myself with positive energy. Even in darker times when it's difficult to be happy, I allow the negative feelings to have a brief period of time and then focus my mind back to a better state.
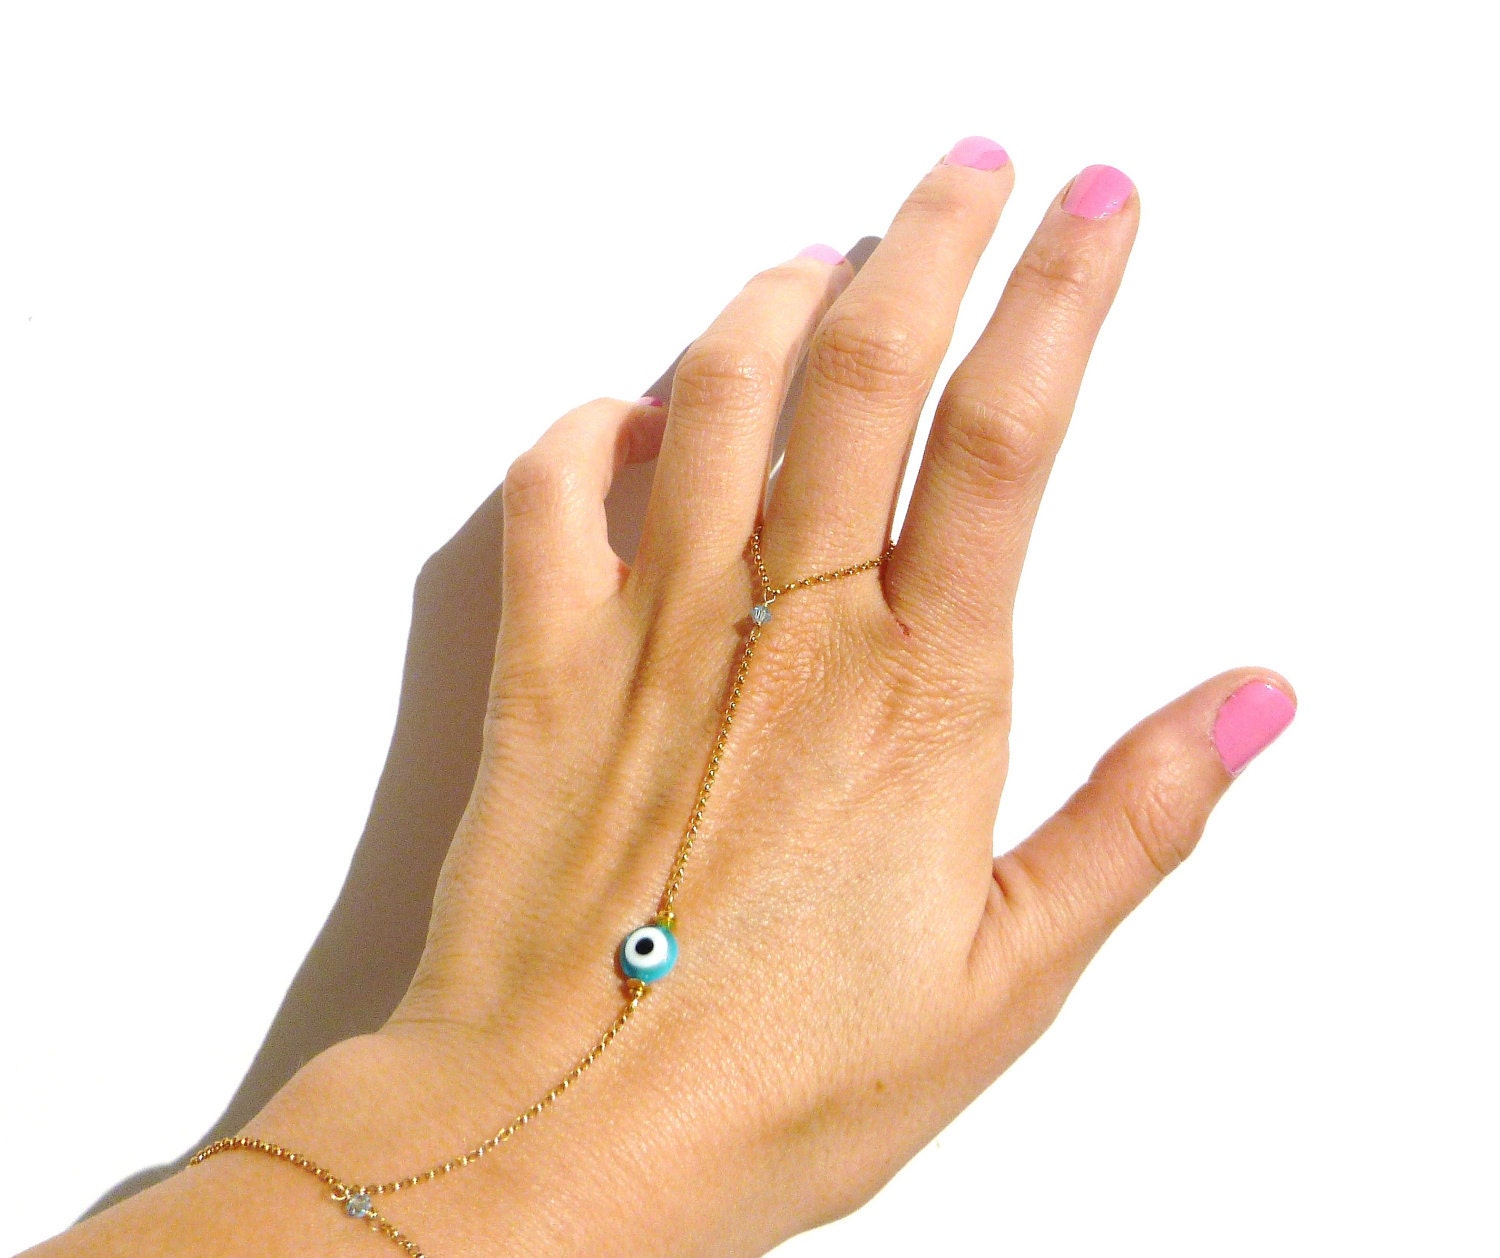
Recently I learned of something called the evil eye bracelet. I have always heard the phrase "Don't give me the evil eye," but I had no idea that people wore bracelets to ward off this look.

www.ustrendy.com

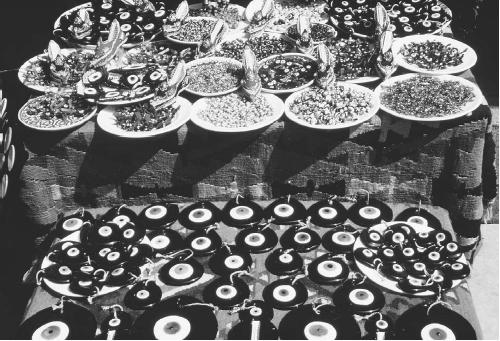
In ancient times people carried around different types of talismans to protect themselves from enemies or people who wished them harm by giving them the evil eye. Supposedly, one look could cause sickness and misfortune. Even those who were most superstitious believed compliments could cause physical or mental harm. Depending on their location and culture, the talismans usually had a small blue (or green) and white oval shape in the center, otherwise known as the evil eye. It was thought that these talismans would deflect the bad energy and send it back to the source.

An outdoor market in Instanbul. 

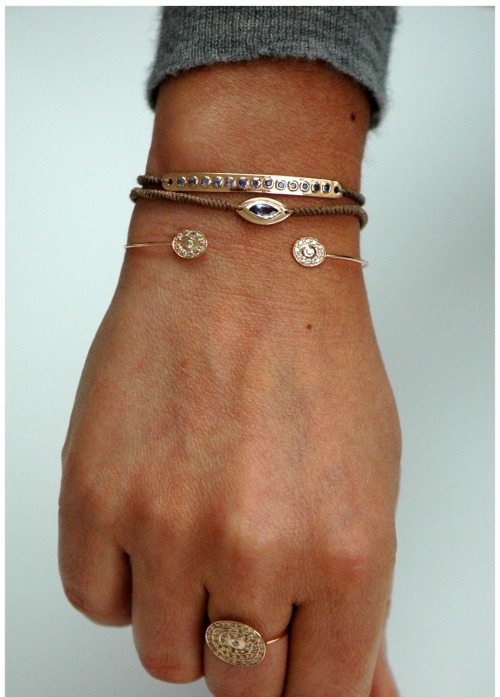
It is easy to understand why people took these measures so many years ago, especially considering they had no answers for sickness or couldn't comprehend the real cause of "bad luck." Even now I understand why people have bought into this practice, but while I believe it is really just a case of mind over matter, others do need something tangible to hold onto. Regardless of my beliefs, I searched around online to learn more about the evil eye and the jewelry that has developed from this idea. I came across some very unique collections that go beyond bra. Even if they are designed for protection, you can't help but recognize that they are also statement pieces.

Etsy

www.soyouwanna.blogspot.com

www.pepjewelry.com

www.yalyjudaica.com


The Man Repeller

Etsy
Tumblr


06 July 2012

From Old Shirt to Stylish Something New: Updating Basics for a New Look


A basic black suit jacket is always in style, but it is always fun to update the classic look with new twists on the traditional black blazer each season.  This classy black ensemble  from Chloe Pre fall 2012 has me once again remembering why blazers are such an integral part of my wardrobe and thinking of ways to update some of the less than streamlined versions I have in my closet from years past.


Chloe Prefall 2012 Black Suit

Recently, I found an interesting way to update an old black blazer, cropping the top and using and old textured t-shirt trim to jazz it up.  I even made a chic textured pillowcase from the same old t-shirt, and it all started with a trip through my mother's closet.

There have been plenty of times when I have rifled through my own closet and thought to myself, "Why on Earth did I buy that outfit".   I had a similar reaction when I came across a shirt like this green one below in the back of my mother's  unwanted things:


My mom's version of the shirt was black, and slightly less unattractive, still it was a shirt that I couldn't imagine looking good on most people.  The material felt nice and I could see how it might be appealing on a mannequin,  but not on a real body.  I thought maybe it would be a nice fabric to reuse for a craft project.

The ruffled texture, which seems to be the most appealing part of the shirt, makes any woman's chest look strange, no matter what size she is.  The silky fabric's texture however, makes it perfect for repurposing an old pillow and adding some texture to a neutral toned room.

A chic new throw pillow for my couch

In a matter of five minutes, I was able to recycle an old shirt into something new.  I had the leftover sleeves from the original t-shirt and since I was just going to throw them away, I decided to see if I could use them in another craft project.

I had a previously purchased thrift store suit jacket that I was adjusting to make more wearable and I found a clever use for the extra ruffled fabric from the previous project, as an accessorizing material for the jacket.  I had already taken the old jacket, cutting out shoulder pads and altering it to have a  form fitting appearance. The addition of the ruffled fabric to the ends of the sleeves made a nice final touch. 


1. The first thing I did in creating this look was find a piece to accessorize.


2. Next, I sewed a simple cuff in the sleeve to give the suit a more polished look.


3. Thirdly, I located a spot for adding trim and secured the additional fabric with pins.


4. Then I attached the trim to the sleeves for a feathered look with flair.


5. For a second look, I considered using the leftover material from the t-shirt to create designs on the back of the cropped suit jacket.


6. Finally, I had my mom model the finished look: an updated blazer with a ruffled trim on the end of quarter-length sleeves. The lightweight material and the open blazer fit make it perfect for covering up a summer dress on chilly nights. 


03 July 2012

DIY: Prada Inspired, Faux Fur Clutch

Spring 2012 Prada Fox Fur Clutch


A chic clutch is always in fashion. With this season's brights and fringes, and furs for the upcoming fall season, a Neon Fur Clutch is the perfect diy project for crafting a trendy accessory. Upcylced and thrifted materials in neon colors are perfect for making a fast, diy clutch with few materials and a few minutes of spare time. 


My Version: Faux Fur, not Fox

This pink fur clutch is an upcylced version of the Prada fur clutch I like so much.
The first step in making a clutch is to find a suitable material.  The best places to look are often thrift stores that have fur for cheap or carry smaller scraps of fabric that don't have much other use but are good for small upcycling projects.


I stumbled upon this piece of pink material for less than a dollar at the thrift store a while back and its small size and interesting color made it perfect for a clutch project. Fortunately for me, it already had a nice backing, so sewing on a lining to the inside of the material was not necessary. Since the clutch is a smaller, hand held purse, it is fine to use most materials in construction but if looking to create a purse that is carried by a strap, it is important to choose a more durable fabric or one that can be fitted with a lining. 


This piece of thrifted fabric was already craft-ready, but if you can't find something ready for use, the next best thing is an old coat or outfit with fur features.  These tend to have nice lining and are ready for crafting after only the most basic of steps.


Once you have found a good fabric or put in a liner, you are ready to assemble the clutch.
You can sew the fabric as is, or cut it to a particular size depending on your personal tastes.  My fabric was about six inches of length and four inches of width, so it was already in a nice rectangular shape for a clutch. Once it is cut to a preferred size, simply fold in half and pin two of the remaining sides, leaving the top open for a zipper. 


Starting on one of the pinned  sides, sew down towards the folded side and continue to sew until you have gone over the other pinned side and now have three sides sewn together (excluding the top).


Make sure that you are sewing with the fabric inside out, as to hide the stitches.  Once all three sides are sewn, you should have something that resembles this, a pouch with an open top.


The next step is to turn your bag right side out and determine where you want to place the zipper.


Lining up the top edge of the clutch with the zipper is especially important.


I pinned my zipper on the front of the fabric to get an idea of what my finished clutch would look like, but it is best to flip your material inside out for pining the zipper on and for sewing purposes. 


When finished attaching the zipper, your project begins to take on the look of an actual clutch:


The project starting to look like an actual clutch and not just a piece of pink fabric.


In order to complete the look, I wanted to accessorize the zipper with something shiny.

My Supplies

I rooted in my craft supply box to find both pliers (handy for creating a unique zipper pull) and old charms that would serve as finishing touches for the small clutch.

Getting Handy With Old Jewelry 

 
A charm from an old necklace made the perfect pull-tab for the newly attached zipper. 


Purse with pulltab zipper

Once the zipper tab was finished, I decided to add one smaller thing to make the purse more versatile: an old necklace chain that would serve as a strap for converting the clutch into a piece that can be carried like a handbag. 


Necklace Added to Turn Clutch into Portable Purse


The Final Product On Display


The compact clutch  even makes the perfect makeup bag. 


While my version is not nearly as fabulous as the Prada version, it's definitely a nice substitute.  At less than $2.00 and only a few minutes to make, it was not only worth it, but also a fun way for me to use old fabric and supplies that I had sitting around.